

My neighbor Tom grilled with the same brush for four summers. A standard wire bristle brush, the kind that costs three dollars at the hardware store. Last summer he found a bristle in his chicken thigh before he ate it. That was the end of that brush. I have been down that road too, and it is what pushed me to figure out the right way to clean grill grates, not just the fast way. If your grates are coated in last season's grease, flaking rust, or mystery carbon, this guide will walk you through the full method I use every single weekend.
Cleaning your grates properly takes maybe ten minutes total. Do it right and your food tastes better, your grates last longer, and you are not feeding your family stray wire fragments. The tool that made the biggest difference for me is the GRILLART Bristle-Free Grill Brush, an 18-inch stainless steel woven-wire brush rated 4.6 stars by more than 15,000 backyard cooks. No loose bristles to shed. The woven wire wraps around the grate bars and scrubs all three sides at once. I use it at both ends of every cook.
Stop Cleaning Around the Problem. Get a Brush Built for Safe Scrubbing.
The GRILLART bristle-free grill brush uses woven stainless wire instead of individual bristles, so nothing sheds into your food. It is the tool this guide is built around. Check today's price before your next cookout.
Amazon Check Today's Price on Amazon →Step 1: Preheat the Grill for 10 to 15 Minutes Before You Brush
Heat is your best cleaning ally. Turn all burners to high, close the lid, and let the grill run for 10 to 15 minutes. On a charcoal grill, let the coals get fully ashed over and raked to a solid bed before you start. The intense heat incinerates leftover grease and food residue, turning it into ash that brushes off easily. Trying to scrub cold or lukewarm grates is both harder and less effective. The gunk sticks. The wire slides. You get frustrated and quit early.
This step also matters for safety. Hot grates kill bacteria from the last cook. If you grilled chicken the weekend before and left residue on there, a proper preheat takes care of it before your brush even touches the surface. I learned this the hard way during a camping trip where I skipped the preheat and ended up scrubbing for twenty minutes on grates that never really came clean.
Step 2: Scrub the Hot Grates With a Bristle-Free Brush
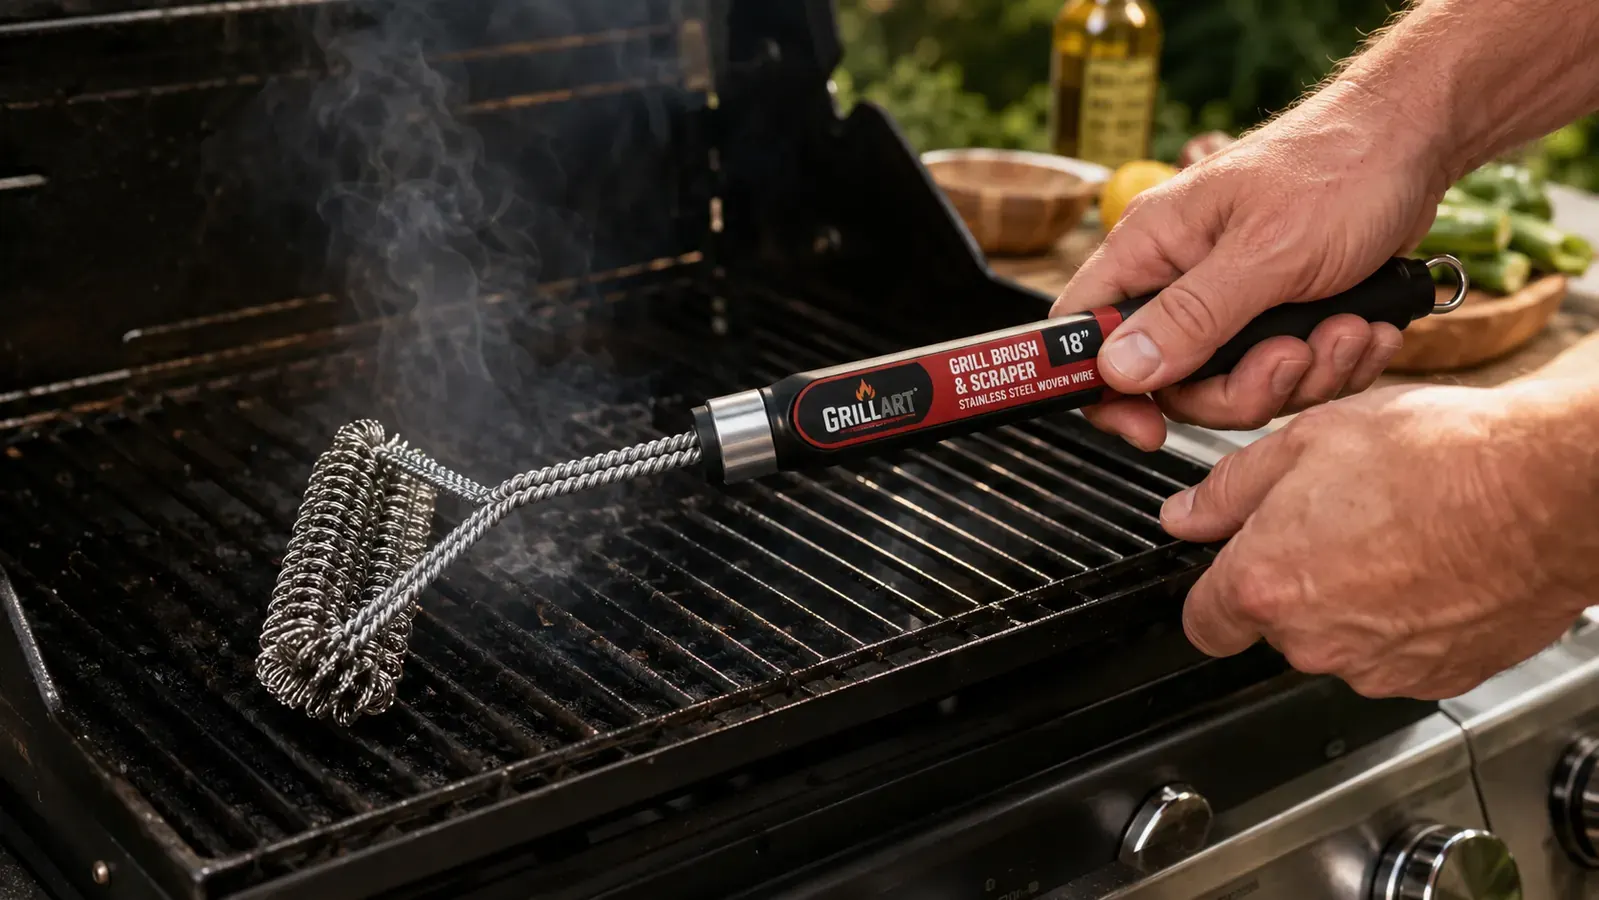
With the grates hot, open the lid and use your grill brush immediately. The GRILLART woven-wire design cleans the top, bottom, and sides of each grate bar in a single pass. Work front to back in long, firm strokes. Apply real pressure. You will see flakes and ash falling through to the drip tray below. That is the point. Do not rush this step. Go over the full cooking surface at least twice, including the edges near the burner covers where grease tends to collect and harden.
A lot of people use their brush once at the start of a cook and call it done. That is fine, but it is only half the job. The better habit is brushing after every cook as well, while the grates are still hot. Post-cook debris is softer and comes off in seconds. That five-minute brush at the end saves you from a brutal fifteen-minute scrub session the following weekend. I switched to this two-sided habit about two years ago and my grates have been in noticeably better condition ever since.
One note on wire brushes: inspect yours before every session. Even woven-wire brushes wear down over time. Look at the head. If the woven wire is fraying, separating, or showing gaps, replace the brush. The GRILLART is built tougher than most, but no tool lasts forever, and a worn-out brush of any type is less effective and potentially less safe.
Step 3: Scrape Stubborn Spots With the Built-In Scraper
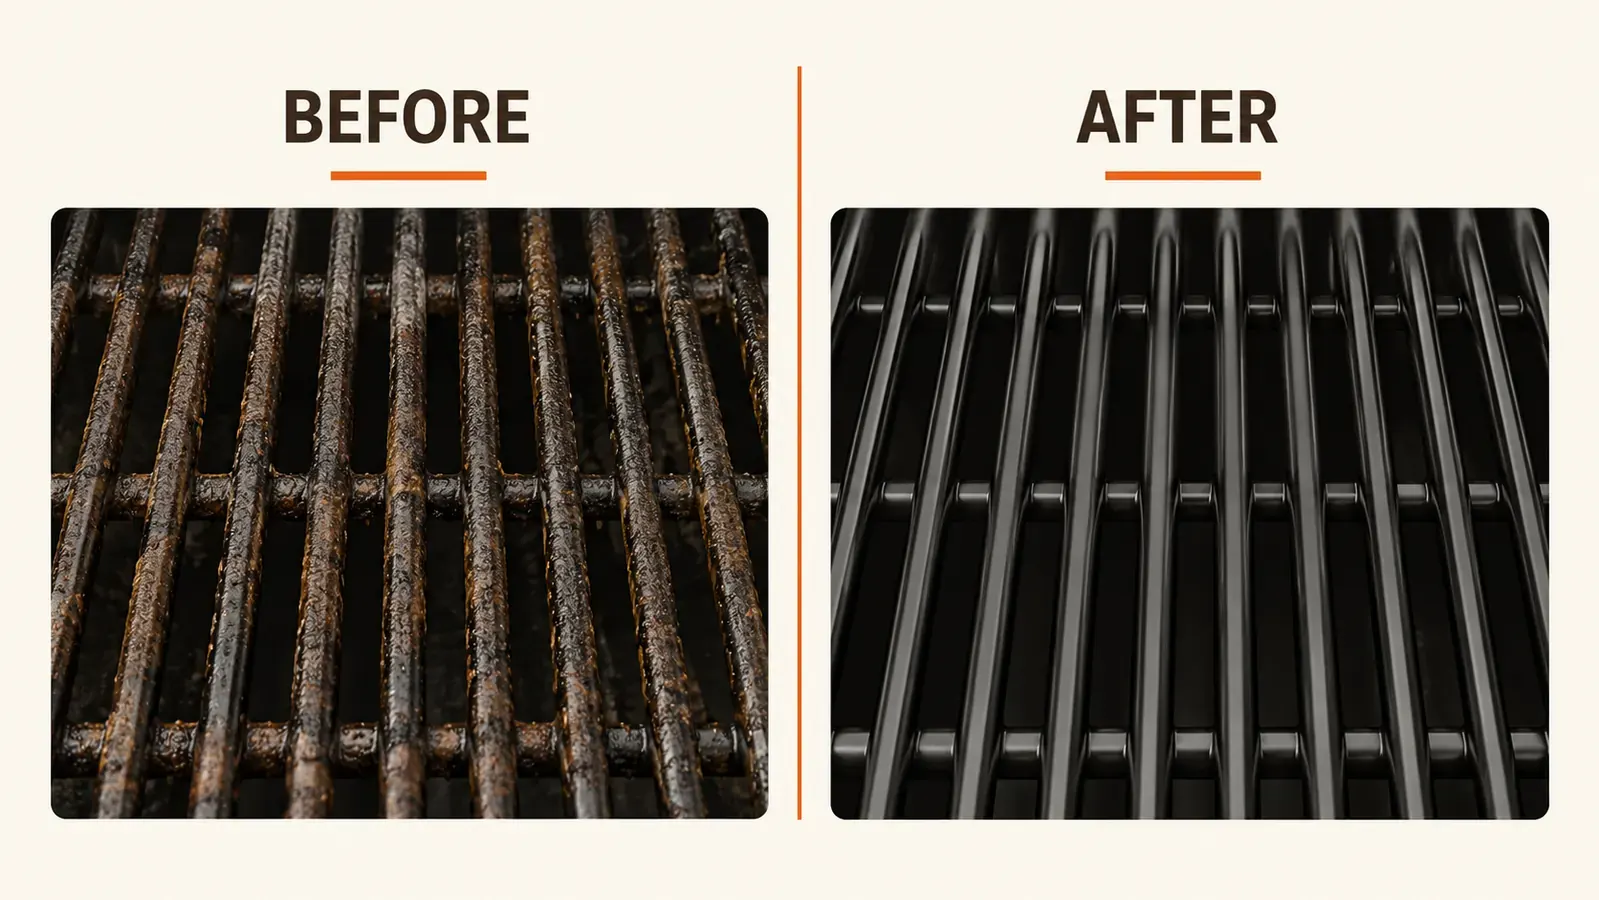
After two passes with the brush, look for any remaining stuck-on carbon or caramelized drippings. The GRILLART has a built-in scraper on the back of the head specifically for this. Flip it around and work those stubborn patches with short, focused strokes. For cast iron grates, a putty knife or dedicated grate scraper also works, but the integrated scraper on the GRILLART saves you from hunting down a separate tool. I keep mine hooked on the grill handle so it is always within reach.
If you have grates that have not been cleaned in months and have serious carbon buildup, a single session might not get them all the way clean. That is okay. Do your best with the brush and scraper, then cook on them again. The heat of the next cook will continue to loosen that old carbon. After two or three hot sessions plus good brushing, most grates come back to a workable state. Truly neglected grates sometimes need a deep soak, which is covered in Step 5.
Step 4: Oil the Grates to Season Them and Prevent Rust
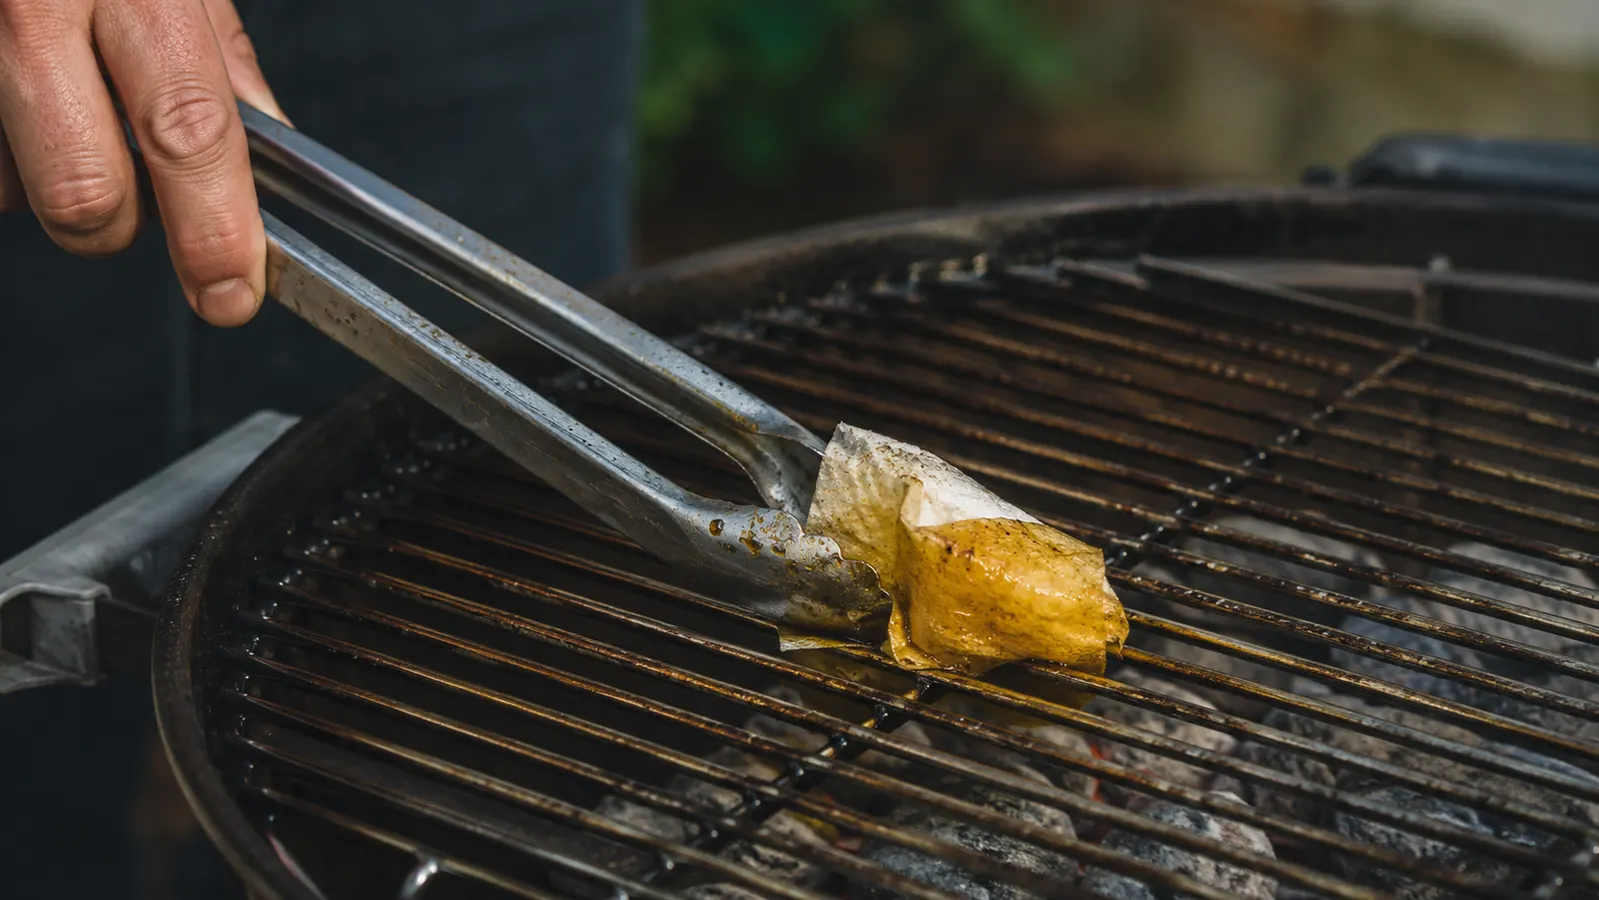
Once the grates are scrubbed clean and still hot, oil them. Fold a paper towel into a small square, soak it with a high smoke-point oil (vegetable, canola, or grapeseed are all fine), clamp it with long tongs, and wipe it quickly across the grate surface. You are not soaking the grates, just putting a thin film of oil on them. This does two things: it creates a non-stick surface for whatever you are about to cook, and it protects bare metal from moisture that leads to rust.
Do not use olive oil. The smoke point is too low. It will burn off before it can season anything and you will smell it in your food. Same goes for butter. Canola oil is what I keep next to the grill. It is cheap, has a smoke point around 400 degrees, and works perfectly for this purpose. Apply it before every cook, not just after a deep clean. Consistent oiling is the difference between grates that last three seasons and grates that rust out after one.
Consistent oiling takes thirty seconds and extends the life of your grates by years. Skip it long enough and you will be buying new grates, not a better brush.

Step 5: Deep Clean Neglected Grates With a Soak (When Needed)
If you inherited a grill, bought one used, or just let maintenance slide through a busy summer, a preheat-and-brush session alone will not be enough. For grates with thick, baked-on carbon, you need a soak. Remove the grates from the grill and place them in a large plastic trash bag. Add a half cup of dish soap and about a cup of white vinegar, then close the bag and let it sit overnight. The combination of soap and mild acid breaks down the carbon and grease so it wipes away the next morning.
After the soak, rinse the grates with a garden hose and use your GRILLART brush to scrub off any remaining residue. Dry them immediately with a towel. Do not let them air dry, especially cast iron, because surface rust forms quickly. Once dry, put them back on the grill, fire it up for ten minutes to burn off any soap residue, then oil them thoroughly. After a proper soak and re-seasoning, most grates look and perform like new.
A couple of things to keep in mind for this step: porcelain-coated grates chip if you use abrasive steel wool on them. Stick to your grill brush and a soft sponge for those. Cast iron grates can handle more aggressive scrubbing but they absolutely need to be oiled immediately after any wet cleaning or they will rust overnight. Stainless steel grates are the most forgiving, but they still benefit from oiling after a soak.
What Else Helps: Habits That Keep Grates Clean Between Cooks
The most useful thing I ever did for my grates was stop thinking of cleaning as a once-in-a-while chore and start treating it as the last step of every single cook. After the food comes off, the lid goes back on for five minutes on high heat, then a quick brush. Total time: six minutes. That one habit has cut down my deep-cleaning sessions from monthly to maybe twice a year.
Covering your grill also matters more than most people realize. A fitted grill cover keeps rain, morning dew, and humidity off your grates between cooks. Even a well-oiled grate will rust if it sits uncovered through a wet week. I use a basic cover from the hardware store. It is nothing special, but it has kept my grates in far better shape than when I cooked cover-free.
Finally, inspect your grates at the start of every grilling season. Look for surface rust, cracks, and warping. Surface rust on cast iron can be scrubbed off and re-seasoned. Rust that has eaten through the metal, or grates that are cracked and warped, need to be replaced. Good grates plus proper maintenance are cheaper over time than replacing neglected grates every two years.
If you want a deeper look at the GRILLART brush itself, including how the woven-wire head holds up after a full year of weekly use, check out my long-term review: GRILLART Grill Brush Review: 12 Months of Honest Weekend Use. And if you are still on the fence about whether a bristle-free design actually matters, this breakdown covers the safety and performance case: 10 Reasons to Switch to a Bristle-Free Grill Brush.
The Right Brush Makes Every Step in This Guide Easier
The GRILLART bristle-free grill brush handles Steps 2 and 3 of this guide with one tool: woven stainless wire for scrubbing, a built-in scraper for stubborn spots. Over 15,000 backyard cooks use it. Check today's price and pick one up before your next cook.
Amazon Check Today's Price on Amazon →